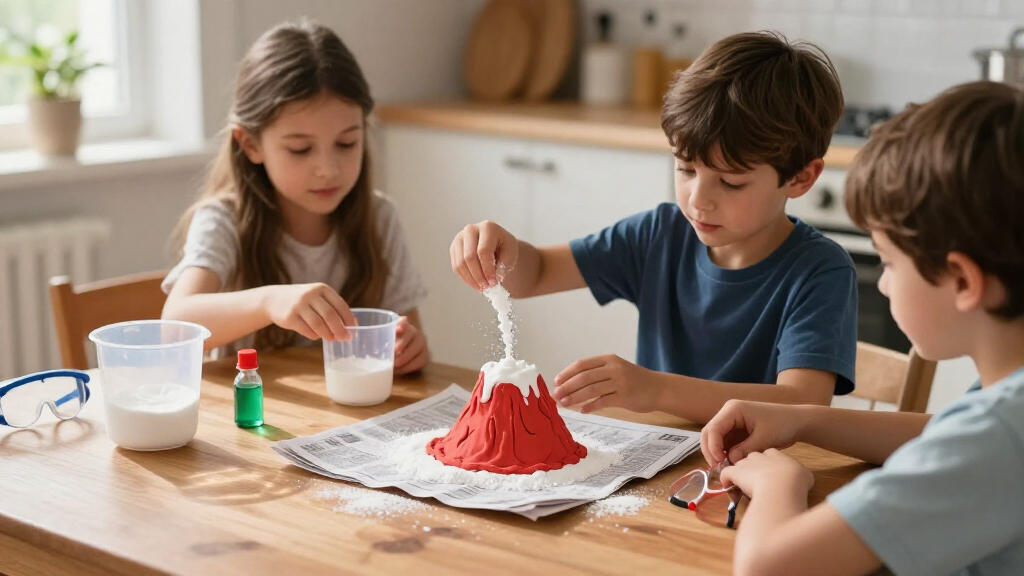

This guide shows you how to pick the right educational science kit for a child, prepare the workspace, run the activities successfully, and confirm the results. It is written for parents, grandparents, tutors, and caregivers who want a science kit session that actually works — not one that ends in a spilled mess, missing parts, or a disappointed kid. No science background is required. The whole process, from choosing the kit to finishing the first experiment, takes roughly one to three hours depending on the kit’s complexity. You will learn where to buy, what to check before you start, how to run the experiment step by step with a child, and what to do when something goes wrong.

Prime made for students and young adults
- Fast, free delivery for dorm and study essentials
- Prime Video and Amazon Music included
- Member-only deals

Doctor Jupiter Ultimate Science Experiments Kit for Kids Ages 8+
- ✔ Recommended age: 8+ years
- ✔ Number of experiments: 50+
- ✔ Instruction manual: Illustrated, step-by-step with science explanations

Kuovei Science Kit for Kids with 80 Experiments
- ✔ Brand: Kuovei
- ✔ Number of experiments: 80
- ✔ Recommended age: Over 6 years
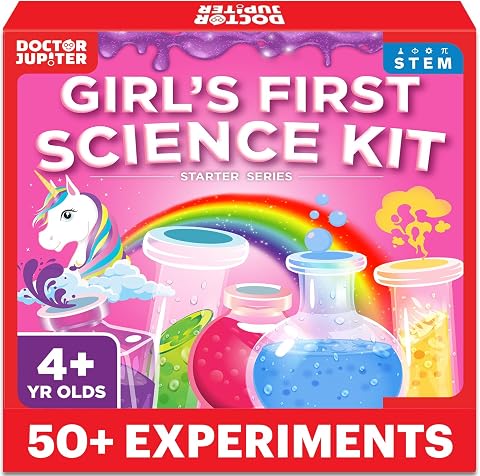
Doctor Jupiter First Science Experiments Kit for Kids Ages 4+
- ✔ Brand: Doctor Jupiter
- ✔ Age range: 4–12 years
- ✔ Number of experiments: 50+
Difficulty: Beginner | Time: 1-3 hours (including setup and cleanup)
What You’ll Need
Tools & Materials:
- A science kit matched to the child’s age and interests (chemistry set, crystal growing kit, electronics kit, microscope kit, volcano kit, or similar)
- A flat, washable work surface (kitchen table or counter with newspaper or a plastic tablecloth)
- Paper towels and a roll of paper or old towel for spills
- A bowl of water and access to a sink
- Safety items: safety glasses (often included in the kit), an apron or old shirt
- A timer or phone stopwatch
- A notebook and pencil for recording observations
- A container or zip bag to store leftover parts and small components
- Batteries in the correct size if the kit requires them (check the box before you start)
Knowledge:
- Ability to read and follow printed step-by-step instructions
- Basic household skills: measuring liquids, using a spoon, wiping spills
- No prior science knowledge needed — kit manuals explain the concepts
Check the recommended age on the box and treat it as a real limit, not a suggestion. Kits labeled 8+ often contain chemicals, small parts, or sharp tools that are unsafe for younger children even with supervision. If you are working with a child under 8, choose kits marked 6+ or ‘junior’ and plan to do every hands-on step together.
If the kit involves chemicals (color-changing tablets, crystal-growing powder, citric acid), read the safety sheet in the manual before opening any packets, and know where your nearest water source and phone are. Never let a child taste or sniff supplied chemicals.
Doctor Jupiter Ultimate Science Experiments Kit for Kids Ages 8+
This is the kit we would put in front of most families with children aged eight and up, and the reason is balance. With over 50 experiments — including color-changing volcanoes and rainbow crystals — it offers enough variety to survive months of weekend use without feeling repetitive, and the illustrated, step-by-step manual does something cheaper kits often skip: it explains the actual science behind each activity. That explanation is what earns it the top spot, because a child who understands why a reaction happens is learning, not just being entertained.Compared with the Kuovei kit, this option has fewer experiments on paper, but the ones it includes are more clearly structured and better documented, which matters for independent use by an eight-year-old. Compared with Doctor Jupiter’s own First Science Kit, this version skews older and more conceptual, so a ten-year-old will find it genuinely engaging rather than babyish. The tradeoff is real, though: some experiments require adult help, particularly anything involving reactions or precise measurement, so this is not a kit you can hand over and walk away from.
Pros:
- Over 50 varied experiments with genuine chemistry-style activities
- Illustrated instructions that also explain the underlying science
- Meets ASTM F963-17 safety standard
- Strongly supports hands-on STEM learning and problem-solving
Cons:
- Some experiments require adult assistance
- Fewer total experiments than the Kuovei kit
- Better suited to older kids than the packaging might suggest
Best for: Children ages 8 to 12 who are ready for structured experiments and parents who want the science explained, not just demonstrated
Not ideal for: Preschoolers or early elementary kids, and parents who need a fully independent-activity kit
Bottom line: The most well-rounded choice for ages 8+, combining variety, clear teaching, and safety compliance in one box.
“The most well-rounded choice for ages 8+, combining variety, clear teaching, and safety compliance in one box.”
Kuovei Science Kit for Kids with 80 Experiments
If your priority is raw variety — a new activity every weekend for well over a year — the Kuovei kit delivers the largest experiment count in this lineup at 80 activities, from rainbow fountains to erupting volcanoes. It also comes with an unusually complete accessory loadout: goggles, test tubes, petri dishes, droppers, gloves, measuring cups, and a wide assortment of reaction materials, so you are not constantly raiding the kitchen for supplies. That completeness is where its value proposition really lives, and it is why this pick makes the most sense for families with multiple children or heavy repeat use.Compared with the Doctor Jupiter Ultimate kit, however, the structure is looser. The guidance cards explain steps and principles, but the overall experience feels more like a pile of activities than a curated curriculum, and the loose age labeling — 36 months to 12 years per the manufacturer, over 6 years per the listing — reflects that ambiguity. Some experiments use chemical materials that require careful handling, so this is firmly a do-it-together kit, not an independent one. Also worth noting: the included components list ends with "and other items," so you cannot verify exactly what is in the box before buying.
Pros:
- 80 experiments, the highest count in this comparison
- Includes safety gear (goggles, gloves) and lab-style tools like test tubes and petri dishes
- Guidance cards explain both steps and scientific principles
- Wide activity range keeps repeat use fresh
Cons:
- Chemical-based experiments demand careful adult handling and supervision
- Vague age guidance and an incomplete published component list
- Less curated and pedagogically structured than the Doctor Jupiter kits
Best for: Budget-minded families who want the most experiments and accessories per purchase and do not mind close supervision
Not ideal for: Buyers who want a precise, transparent component list or a kit a child can use fully independently
Bottom line: The volume play of this roundup — unmatched experiment count and included lab gear, if you accept tighter supervision and less polish.
“The volume play of this roundup — unmatched experiment count and included lab gear, if you accept tighter supervision and less polish.”
Doctor Jupiter First Science Experiments Kit for Kids Ages 4+
The First Science Kit solves a problem the other two kits do not address: what do you give a four- or five-year-old who wants to do "experiments" like their older sibling? The answer here is tactile, sensory-first activities — squishies, oobleck, volcanoes, perfumes, face masks — rather than chemistry. That design choice is smart developmental targeting: young children learn science through touch and cause-and-effect play, and a kit built around mixing and molding keeps them engaged where a reaction-timing experiment would lose them.Like its older sibling, the Ultimate kit, it includes more than 50 experiments with illustrated, step-by-step instructions and meets ASTM F963-17, and the screen-free, hands-on framing makes it a strong alternative to tablets on a rainy afternoon. Compared with the Kuovei kit, which nominally starts at age three, this option is far better suited to genuine beginners because nothing depends on careful chemical handling. The honest tradeoff: the science here is shallower — it builds curiosity and fine motor skills more than formal concepts — and many activities still require an adult to set up and assist, which is simply the reality of kits for this age group.
Pros:
- Genuinely accessible for ages 4 and up, the youngest entry point in this lineup
- Over 50 experiments with illustrated step-by-step instructions
- Screen-free, sensory-rich activities that build early STEM curiosity
- Meets ASTM F963-17 safety standard
Cons:
- Scientific depth is limited compared with the 8+ kits
- Adult assistance needed for many activities
- Expect mess — oobleck and squishies are not tidy projects
Best for: Parents of children ages 4 to 7 who want an introduction to science thinking through sensory, mess-friendly play
Not ideal for: Children over about 8, who will find the activities too simple, and anyone wanting rigorous chemistry content
Bottom line: The right first science kit for preschool and early elementary kids, prioritizing sensory discovery over formal chemistry.
“The right first science kit for preschool and early elementary kids, prioritizing sensory discovery over formal chemistry.”
As an Amazon Associate we earn from qualifying purchases.
Before You Start
Do these three things the day before or at least an hour before the session. First, open the box yourself and read the entire manual. This takes ten minutes and prevents the most common failure: discovering mid-experiment that a step needs overnight refrigeration, hot water, or an ingredient not included in the kit. Second, inventory the parts against the parts list in the manual. Kits occasionally ship missing a component, and it is far better to contact the manufacturer before a child is watching than during. Third, cover your work surface and set out everything — towels, water, notebook, timer — so you never leave the child unattended to fetch supplies.
Pick your timing deliberately. Run experiments when the child is fed and rested, not right before a meal or bedtime. Some kits (crystal growing, bacteria plates, plant kits) need hours or days for results — tell the child this in advance so a slow result reads as part of the plan rather than a failure.
Step-by-Step Instructions
Step 1: Choose a kit that matches the child’s age and interest
Read the age rating, topic, and time commitment on the box before buying. Pick single-outcome kits like volcano eruptions, color mixing, or bug catchers for ages 5-7, since results appear in minutes. Select multi-step kits like crystal growing, basic electronics snap kits, or slime and polymer labs for ages 8-10. Choose chemistry sets, microscope dissection kits, or programmable robotics kits for ages 10+, which hold attention better. Match the topic to what the child already talks about: dinosaurs, space, rocks, or machines. Offer the child two or three suitable options and let them pick — a kit on a topic they chose produces far more engagement than one you picked for them.
Tip: Read the box for ‘additional items required.’ Many kits assume you have vinegar, cooking oil, or a plastic bottle at home. Buy or gather these before the session.
Check: You have a kit rated for the child’s age, on a topic they expressed interest in, and you have every additional household item listed on the box.
Step 2: Read the manual and inventory the parts before involving the child
Open the box alone and read every page of the instruction manual. Lay out each component physically against the parts list to confirm nothing is missing. Separate anything hazardous — chemical packets, blades, glass slides, magnets — into a box the child cannot reach until that step. Choose which experiment you will do first: many kits have a recommended sequence because early experiments teach skills used later.
Tip: Photograph the laid-out parts. If a dispute arises later about whether something was missing or lost, you have a record.
Check: Every item on the parts list is present and accounted for, and you can describe the first experiment from memory.
Step 3: Set up a safe, washable workspace
Spread newspaper or a plastic tablecloth over a kitchen table or counter near a sink. Place the kit parts, towels, water bowl, and notebook within arm’s reach. Dress the child in an apron or old shirt and have them put on safety glasses if the kit includes them — enforce this rule from the very first session so it becomes habit. Tie back long hair. Clear the area of food, drinks, and electronics.
Tip: Work near a window or in a ventilated kitchen if any experiment produces fizzing, foam, or smell. Never run chemistry experiments in a closed bedroom.
Check: The surface is fully covered, everything you need is reachable, and the child is dressed for mess before any packet is opened.
Step 4: Walk through the instructions with the child before starting
Open the manual to the first experiment and have the child read each step aloud, or read it together. Ask them to point to each tool or ingredient the step names. This preview takes two minutes and dramatically reduces mistakes, because the child knows what is coming instead of grabbing and pouring at random. Agree on the rule before you begin: nothing gets poured, mixed, or connected until the step is read.
Check: The child can tell you in their own words what the experiment will do and what the final result should look like.
Step 5: Run the experiment one step at a time
Follow the manual in exact order. Let the child perform every step they safely can — measuring, pouring, stirring, connecting — while you handle anything sharp, hot, or chemical. Narrate what is happening: ‘Watch the color change when the powder hits the water.’ Start the timer immediately for any timed step. Have the child record observations in the notebook as you go: what it looks like, what changed, how long it took. If a step fails or the result looks wrong, stop, reread that step together, and try again rather than pushing forward.
Tip: Measure over the bowl, not over the table. If a pour goes wrong, it lands in the bowl instead of your floor.
Check: You complete the experiment’s final step and the result matches the picture or description in the manual — crystals forming, a circuit lighting an LED, a volcano erupting.
Step 6: Verify the result and talk about why it worked
Compare the outcome to the manual’s expected result. If it matches, ask the child two questions: ‘What did we do that made this happen?’ and ‘What would change if we used twice as much?’ Read the manual’s explanation section together — it answers these questions. If the result does not match, consult the troubleshooting section below before repeating the experiment. Take a photo of the finished result; kids revisit photos and re-explain the science, which is where the learning solidifies.
Check: The child can explain, in one or two sentences, why the result happened.
Step 7: Clean up and store the kit properly
Dispose of chemical mixtures exactly as the manual directs — most kid-safe chemistry results go down the sink with plenty of water, but some (like growing solutions) should not. Rinse all tools, test tubes, and cups with warm water and dry them. Return every component to the kit box and seal chemical packets in a zip bag. Store the kit on a high shelf out of younger children’s reach. Write the date and experiment name in the notebook so the next session starts with a record.
Tip: Do cleanup with the child. Treating it as part of the experiment — not a punishment — keeps future sessions easy to start.
Check: The workspace is clean, all parts are back in the box, and the kit is stored safely out of reach.
Common Mistakes to Avoid
- Buying a kit above the child’s age range to ‘challenge’ them — Follow the age rating. An advanced kit produces frustration and abandoned projects; an age-appropriate one builds the confidence that leads to harder kits later.
- Starting an experiment without reading the full manual first — Always do the private read-through before the session. Kits frequently hide overnight waits, hot water requirements, or missing household ingredients mid-manual.
- The adult does all the hands-on steps — Restrict yourself to sharp, hot, and chemical handling only. The child measuring, pouring, and connecting is where engagement and learning actually happen.
- Rushing through steps or skipping the observation notes — Use the timer for every timed step and pause after each change to record what happened. Rushed sessions produce failed results and missed learning.
Troubleshooting
Problem: The experiment produces no visible result (no crystals, no glow, no reaction)
Solution: Check three things: quantities were measured exactly, the water temperature matched the manual, and the wait time was respected. Crystal and growth kits often need 24-72 hours — wait the full time before judging failure. If the manual was followed exactly and nothing happened, contact the manufacturer; most will replace defective components.
Problem: A chemical or liquid spills on skin, clothes, or eyes
Solution: Rinse immediately with cool running water for at least 15 minutes for skin contact, and remove affected clothing. For eye contact, hold the eye open under gently running water for 15 minutes and seek medical attention. Kid-safe kit chemicals are mild, but treat all contact seriously and keep the kit’s safety sheet handy for ingredient names.
Problem: A part is missing from the box
Solution: Check the packaging material and under tray inserts first — small parts hide in corners. If it is genuinely missing, check the manual for the manufacturer’s support line or website; most kit companies mail replacement parts free. Substitute household items only if the manual explicitly allows it.
Problem: The child loses interest halfway through
Solution: Switch to the fastest-result experiment in the kit — the one with a payoff in under five minutes — and return to the longer one another day. Keep sessions to a child’s realistic attention span: 20-30 minutes for ages 5-7, up to an hour for ages 10+.
What Success Looks Like
The session is successful when four things are true. First, at least one experiment completed and its result matched the manual’s expected outcome or photo. Second, the child performed the hands-on steps themselves and can explain in their own words why the result happened. Third, everything is cleaned, dried, and returned to the box, with chemical packets sealed and the kit stored out of reach of younger children. Fourth, the notebook contains at least one dated observation the child made. When all four are true, you have a repeatable routine you can run with the next kit or the next experiment in the same one.
Next Steps
Schedule the next session within a week while enthusiasm is high — most kits contain multiple experiments designed to be spread across several sittings. For kits with slow results, set a specific check-in time (‘we look at the crystals Saturday morning’) so anticipation becomes part of the experience. As the child finishes kits, move up one difficulty level in the same topic, or branch to a related field: a volcano kit leads naturally to rock and mineral kits, electronics snap kits lead to beginner robotics. If the child repeatedly returns to one topic, consider a subscription science kit service for a steady stream of age-graded material. Keep a running list of experiments completed in the notebook; after a handful of sessions, review it together and let the child design a small variation on a favorite experiment — that is the step from following instructions to doing science.
Frequently Asked Questions
Are science kit chemicals actually safe for kids?
Kits from reputable manufacturers ( Thames & Kosmos, National Geographic, Scientific Explorer, Snap Circuits and similar) use household-grade ingredients like citric acid, baking soda, and food dyes for children’s age ranges. They are safe with supervision, but never let a child taste chemicals, and wash hands after every session. The safety sheet in the manual lists every ingredient — read it before you start.
What is the best age to start science kits?
Around age 5 with simple single-outcome kits like volcano eruption or color-mixing sets, done fully alongside an adult. Independent kit work typically works from age 8 with check-ins, and from age 10 with minimal supervision for kits within the stated age range.
The kit says results take days. How do I keep the child engaged?
Treat the wait as part of the experiment. Have the child photograph or draw the setup each day and note changes in the notebook. Set a fixed observation time so the slow result becomes a daily event rather than a disappointment.
Can I reuse the kit or do repeat experiments?
Hardware-based kits (electronics, microscopes, telescopes) are fully reusable indefinitely. Consumable kits (chemistry, crystal growing) run out — most manufacturers sell refill packs. Repeat runs of the same experiment are valuable: change one variable, like water temperature or quantity, and compare results.
Do I need to know science to guide the sessions?
No. Kit manuals include an explanation section written for beginners. Read it before the session so you can answer basic questions, and let ‘I don’t know — let’s find out’ be an acceptable answer that you resolve together afterward. That models real scientific behavior better than a canned answer.
Halloween Picks
halloween
As an affiliate, we earn on qualifying purchases.